September 9, 2021

Feature Highlights:
- Improved data import with faster processing
- More robust data validation that highlights any potential issues prior to file import
- Clearer progress tracking throughout the four step process of importing users
- Streamlined unlocking and locking out process of Workify users
- Email confirmation to admin when upload is complete
- Historical tracking of uploaded files
Managing Your Employee Data in Workify
Before getting into the details of uploading data, here’s what you need to know about how employee data is held in Workify.
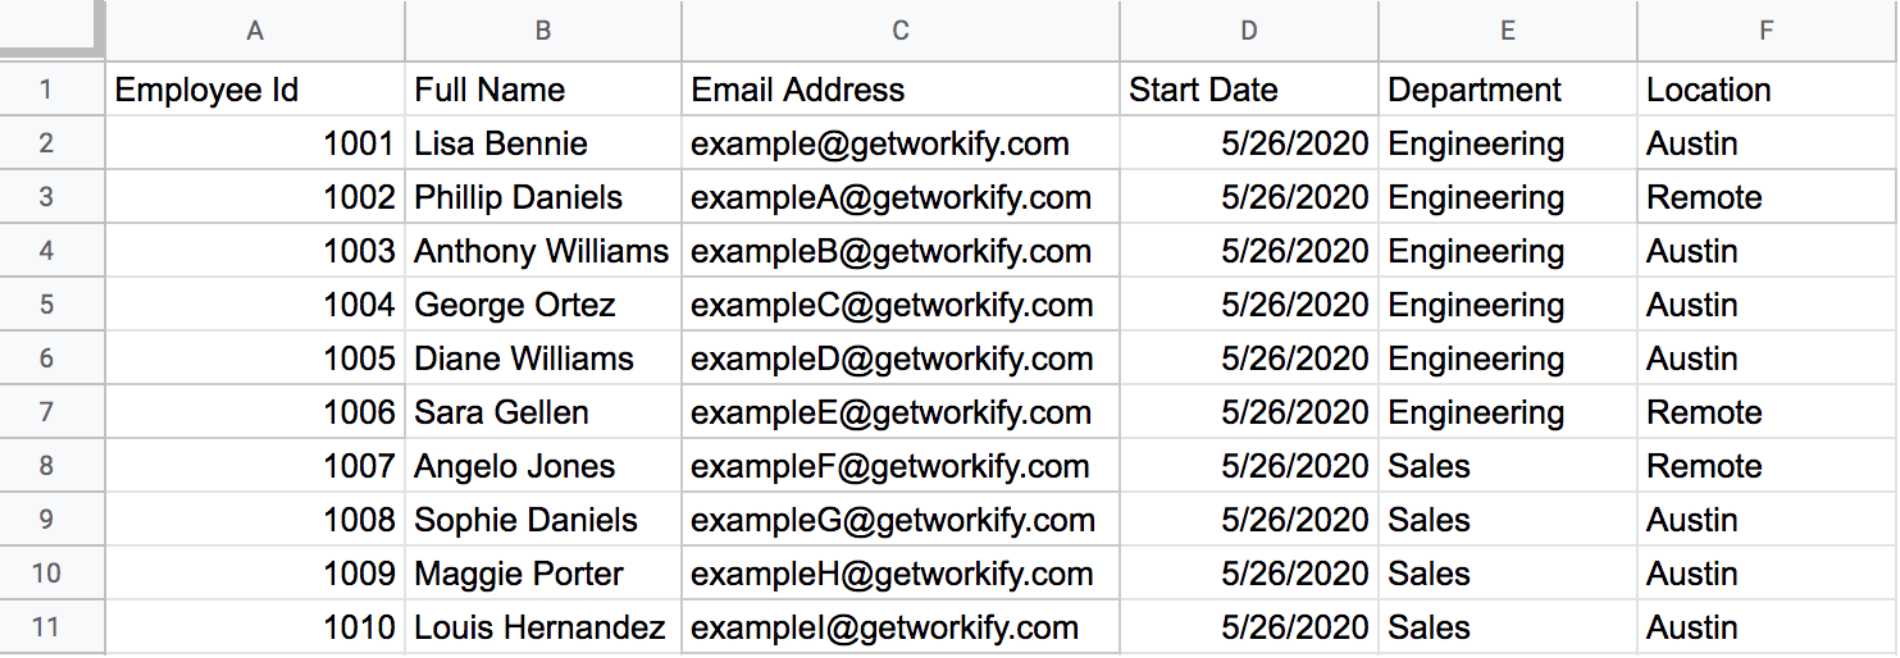
- The information you provide to Workify about your employees is called metadata. We aggregate your employee feedback into groups using these metadata fields.
- To protect anonymity, each group will only display in Workify reporting if there are at least five responses from people in that group. (For example, five people that are listed under ‘Location = Austin’ will need to respond in order for Austin to display in reporting.)
- The minimum fields required are Employee ID, Name, Email or Phone Number, and Start Date.
- The more metadata elements you provide, the more ways we have to analyze your data. (Please contact your Client Success Rep to find the metadata elements that are most beneficial for your company.)
- Workify never deletes any user data. This is why you will see/ hear us use the wording of “Lock” and “Unlock” users. Locking and unlocking users is a way for us to change the state of this employee to “Active” – where they can receive surveys (so Unlocked Users = Active) or “Inactive” – where they will not be sent any surveys (Locked Out Users = Inactive). This data management functionality is helpful in the case of re-hires, where we might want to take an inactive employee and make them active again.
Importing Data into Workify
One of the major changes in the User Data Management process is that importing data into Workify is now a clear four step process.

Step 1 – Upload: After your data file is cleaned up and saved as a .csv file, you can start your upload.
Step 2 – Map: The next step is to make sure that all your data is correctly mapped to the data fields that are already stored in Workify. To do this, make sure that all rows in the Status column show as ‘Valid’. If a row doesn’t show as ‘Valid,’ use the drop-down menu under the Workify Headers column to map the data to what is stored in Workify. If this is your first upload, please just input your field names as you’d like them to display under the ‘Workify Headers’ section.
Step 3 – Validate: This step allows you to review your data prior to importing, so you can identify any issues that may cause you to restart the uploading process (like missing employee ID or email). This also highlights any metadata groups that could cause reporting to be withheld (like blanks, groups less than five, and so on).
Step 4 – Import: After validation, you’ll start the final importing step to get your employee data loaded into Workify and continue on to the survey building process.
Step 1 – Upload
Here are the key things you should think about when creating/updating your data upload:
- We refer to the information you provide to us about your employees as metadata. We use metadata elements to aggregate your employee feedback into groups, like Departments or Locations.
- To protect the anonymity of your employees, each group will only show up in Workify reporting if there are at least five responses from people in that group.
- The more metadata elements you provide, the more ways we have to analyze your data – check out the fields in our data upload sheet for our suggestions.
- The minimum fields required to create an account in Workify are Employee Id, Name, Email (or phone number) and Start Date, so please make sure you include those.
After your data sheet with employee information is finalized and saved as a .csv file, you can use that to upload the data into Workify. If you need your company’s template data sheet, please reach out to your Client Success representative.
Under the People page in Workify, use the option to Add Many Users.
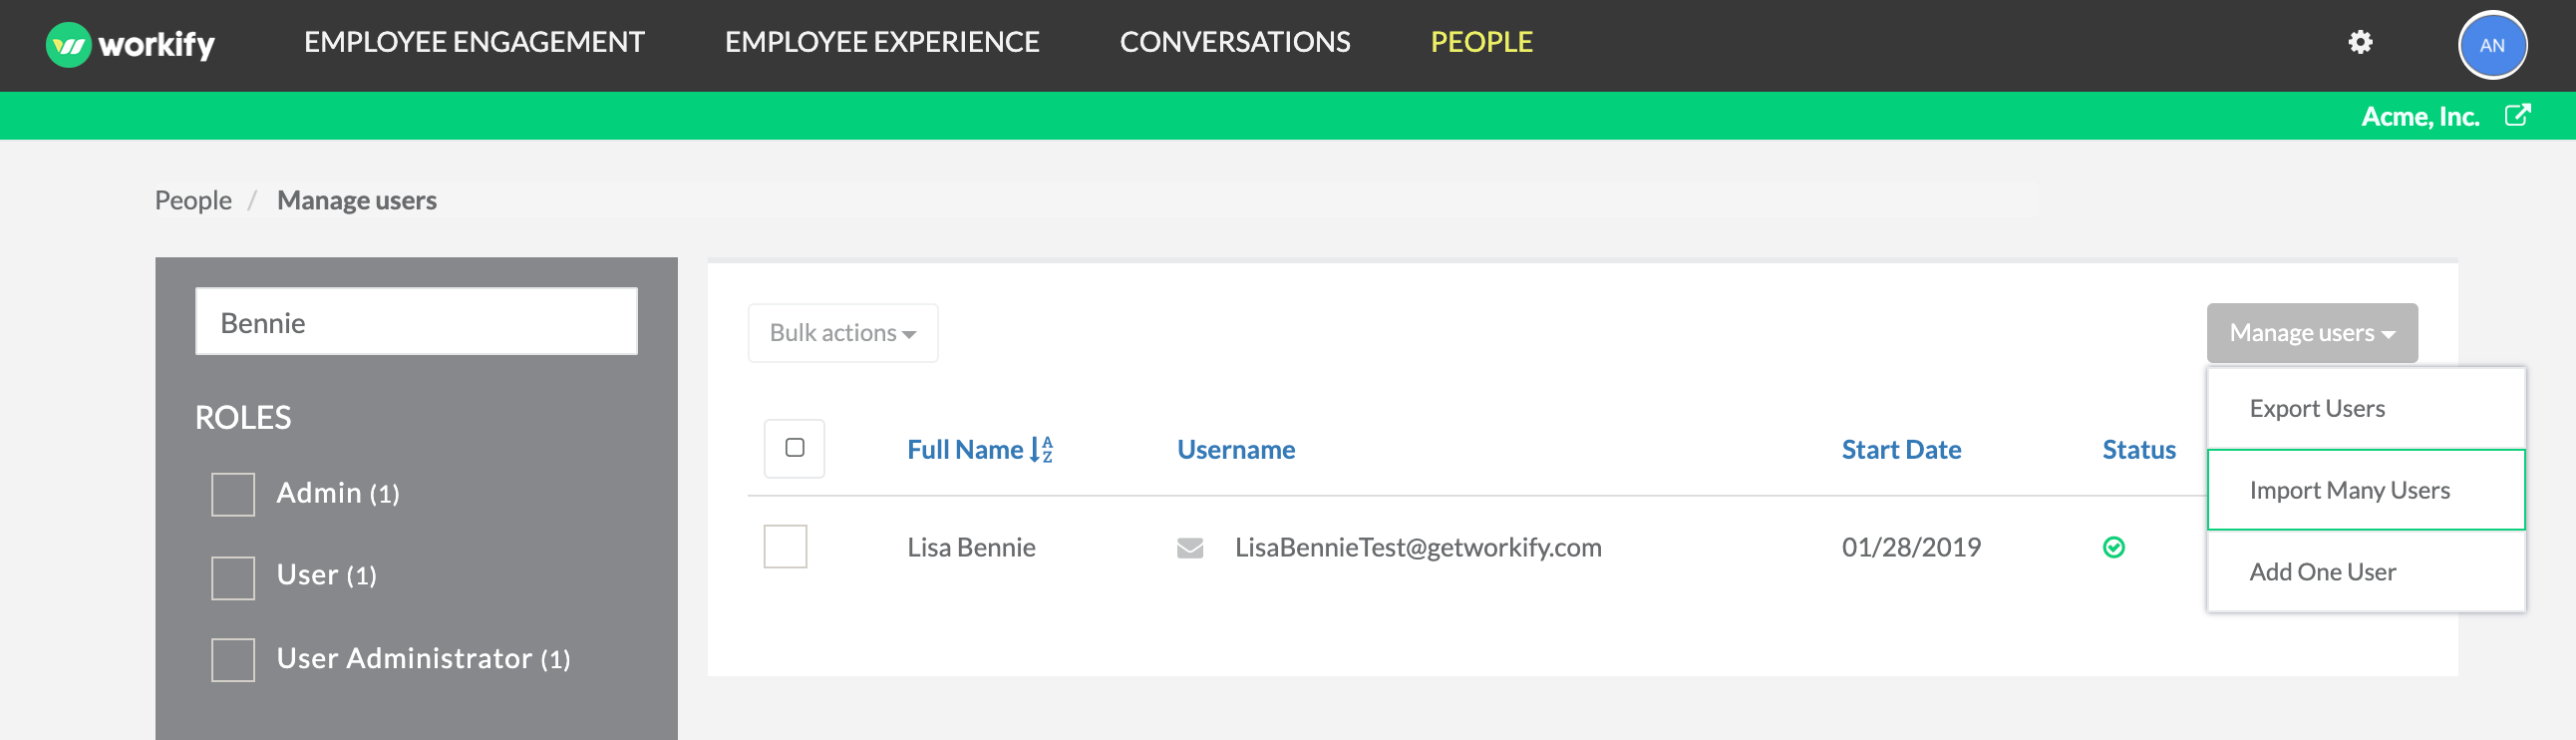
On the Import Users page, click the Import Users button on the left hand side of your screen.
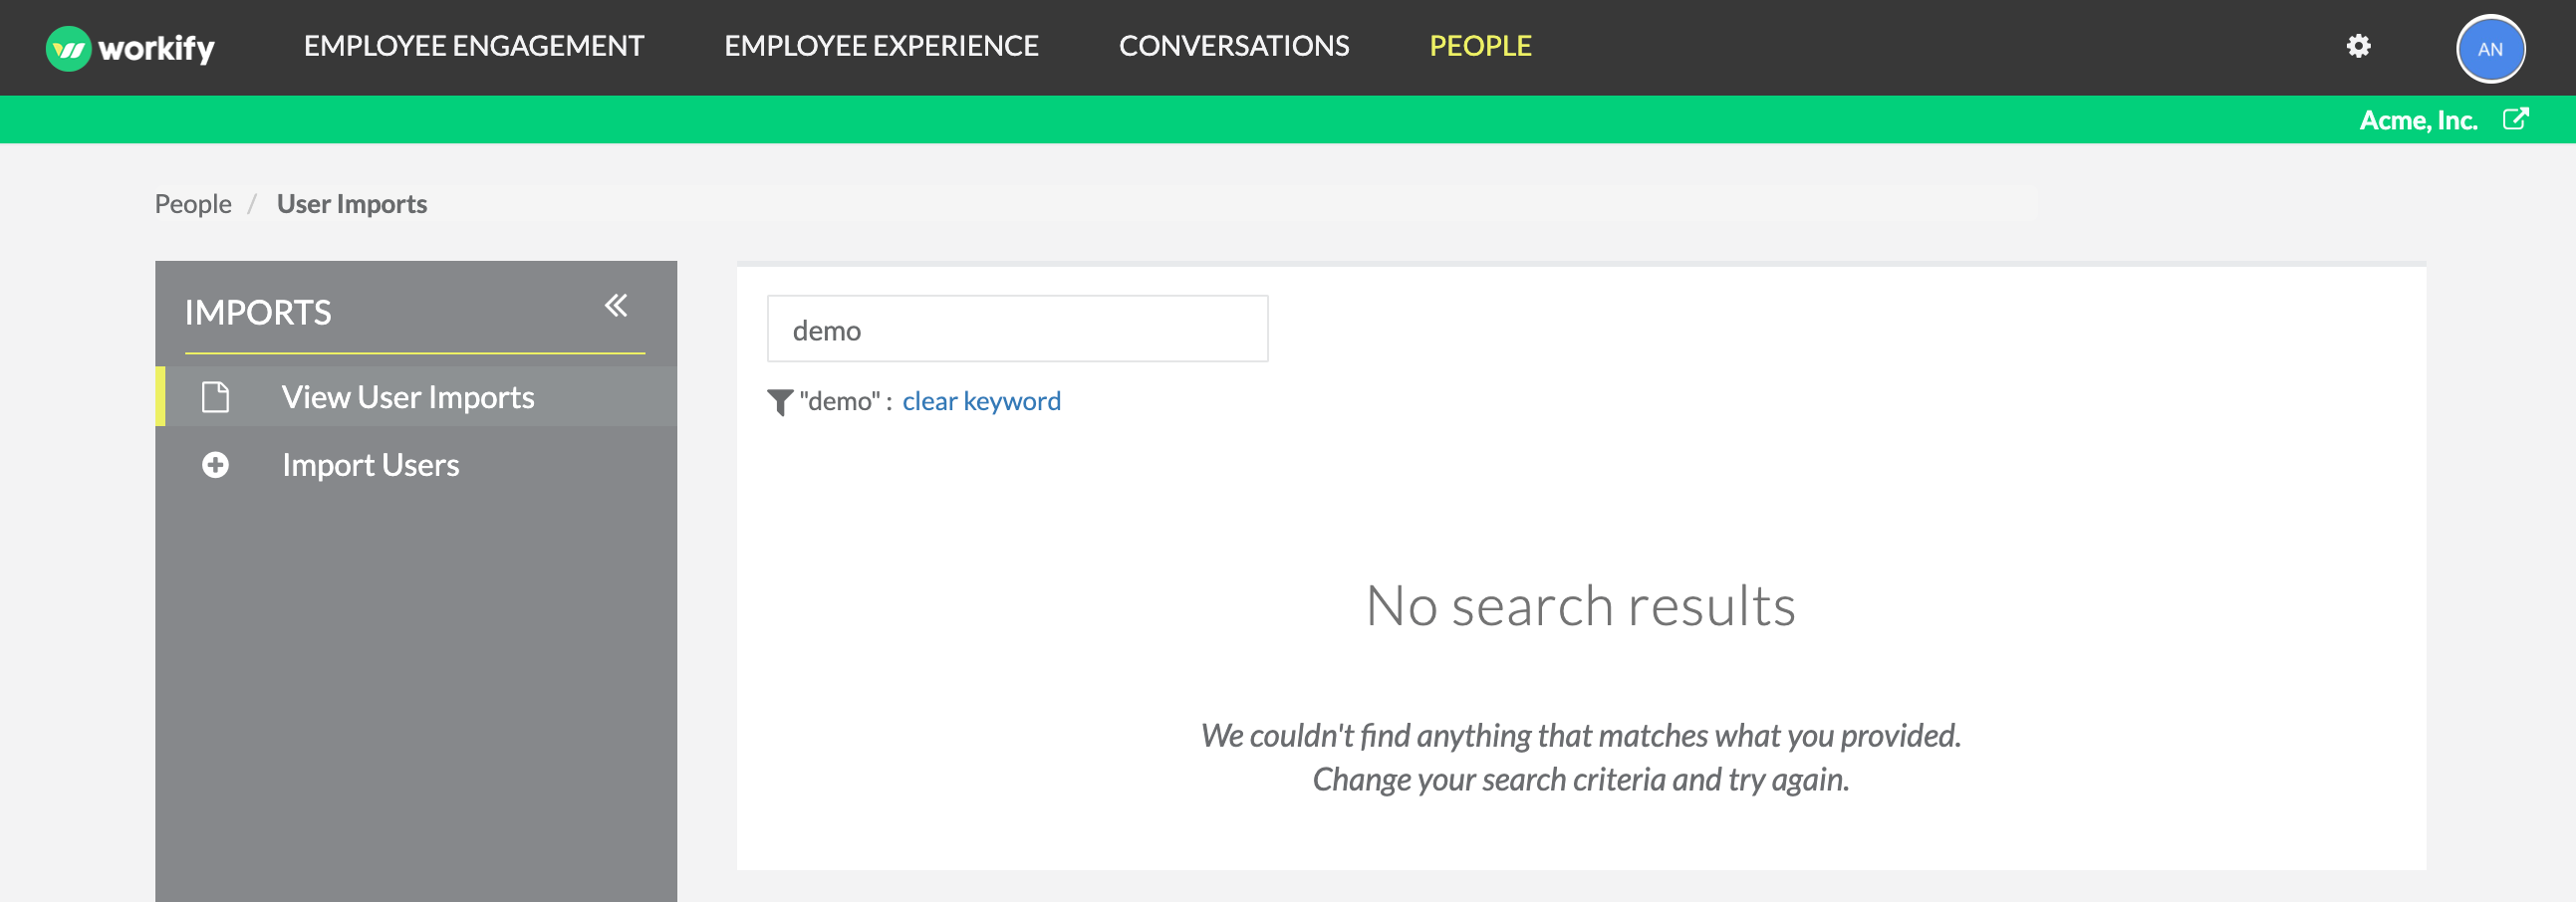
On the Import Users page, click the Import Users button on the left hand side of your screen.
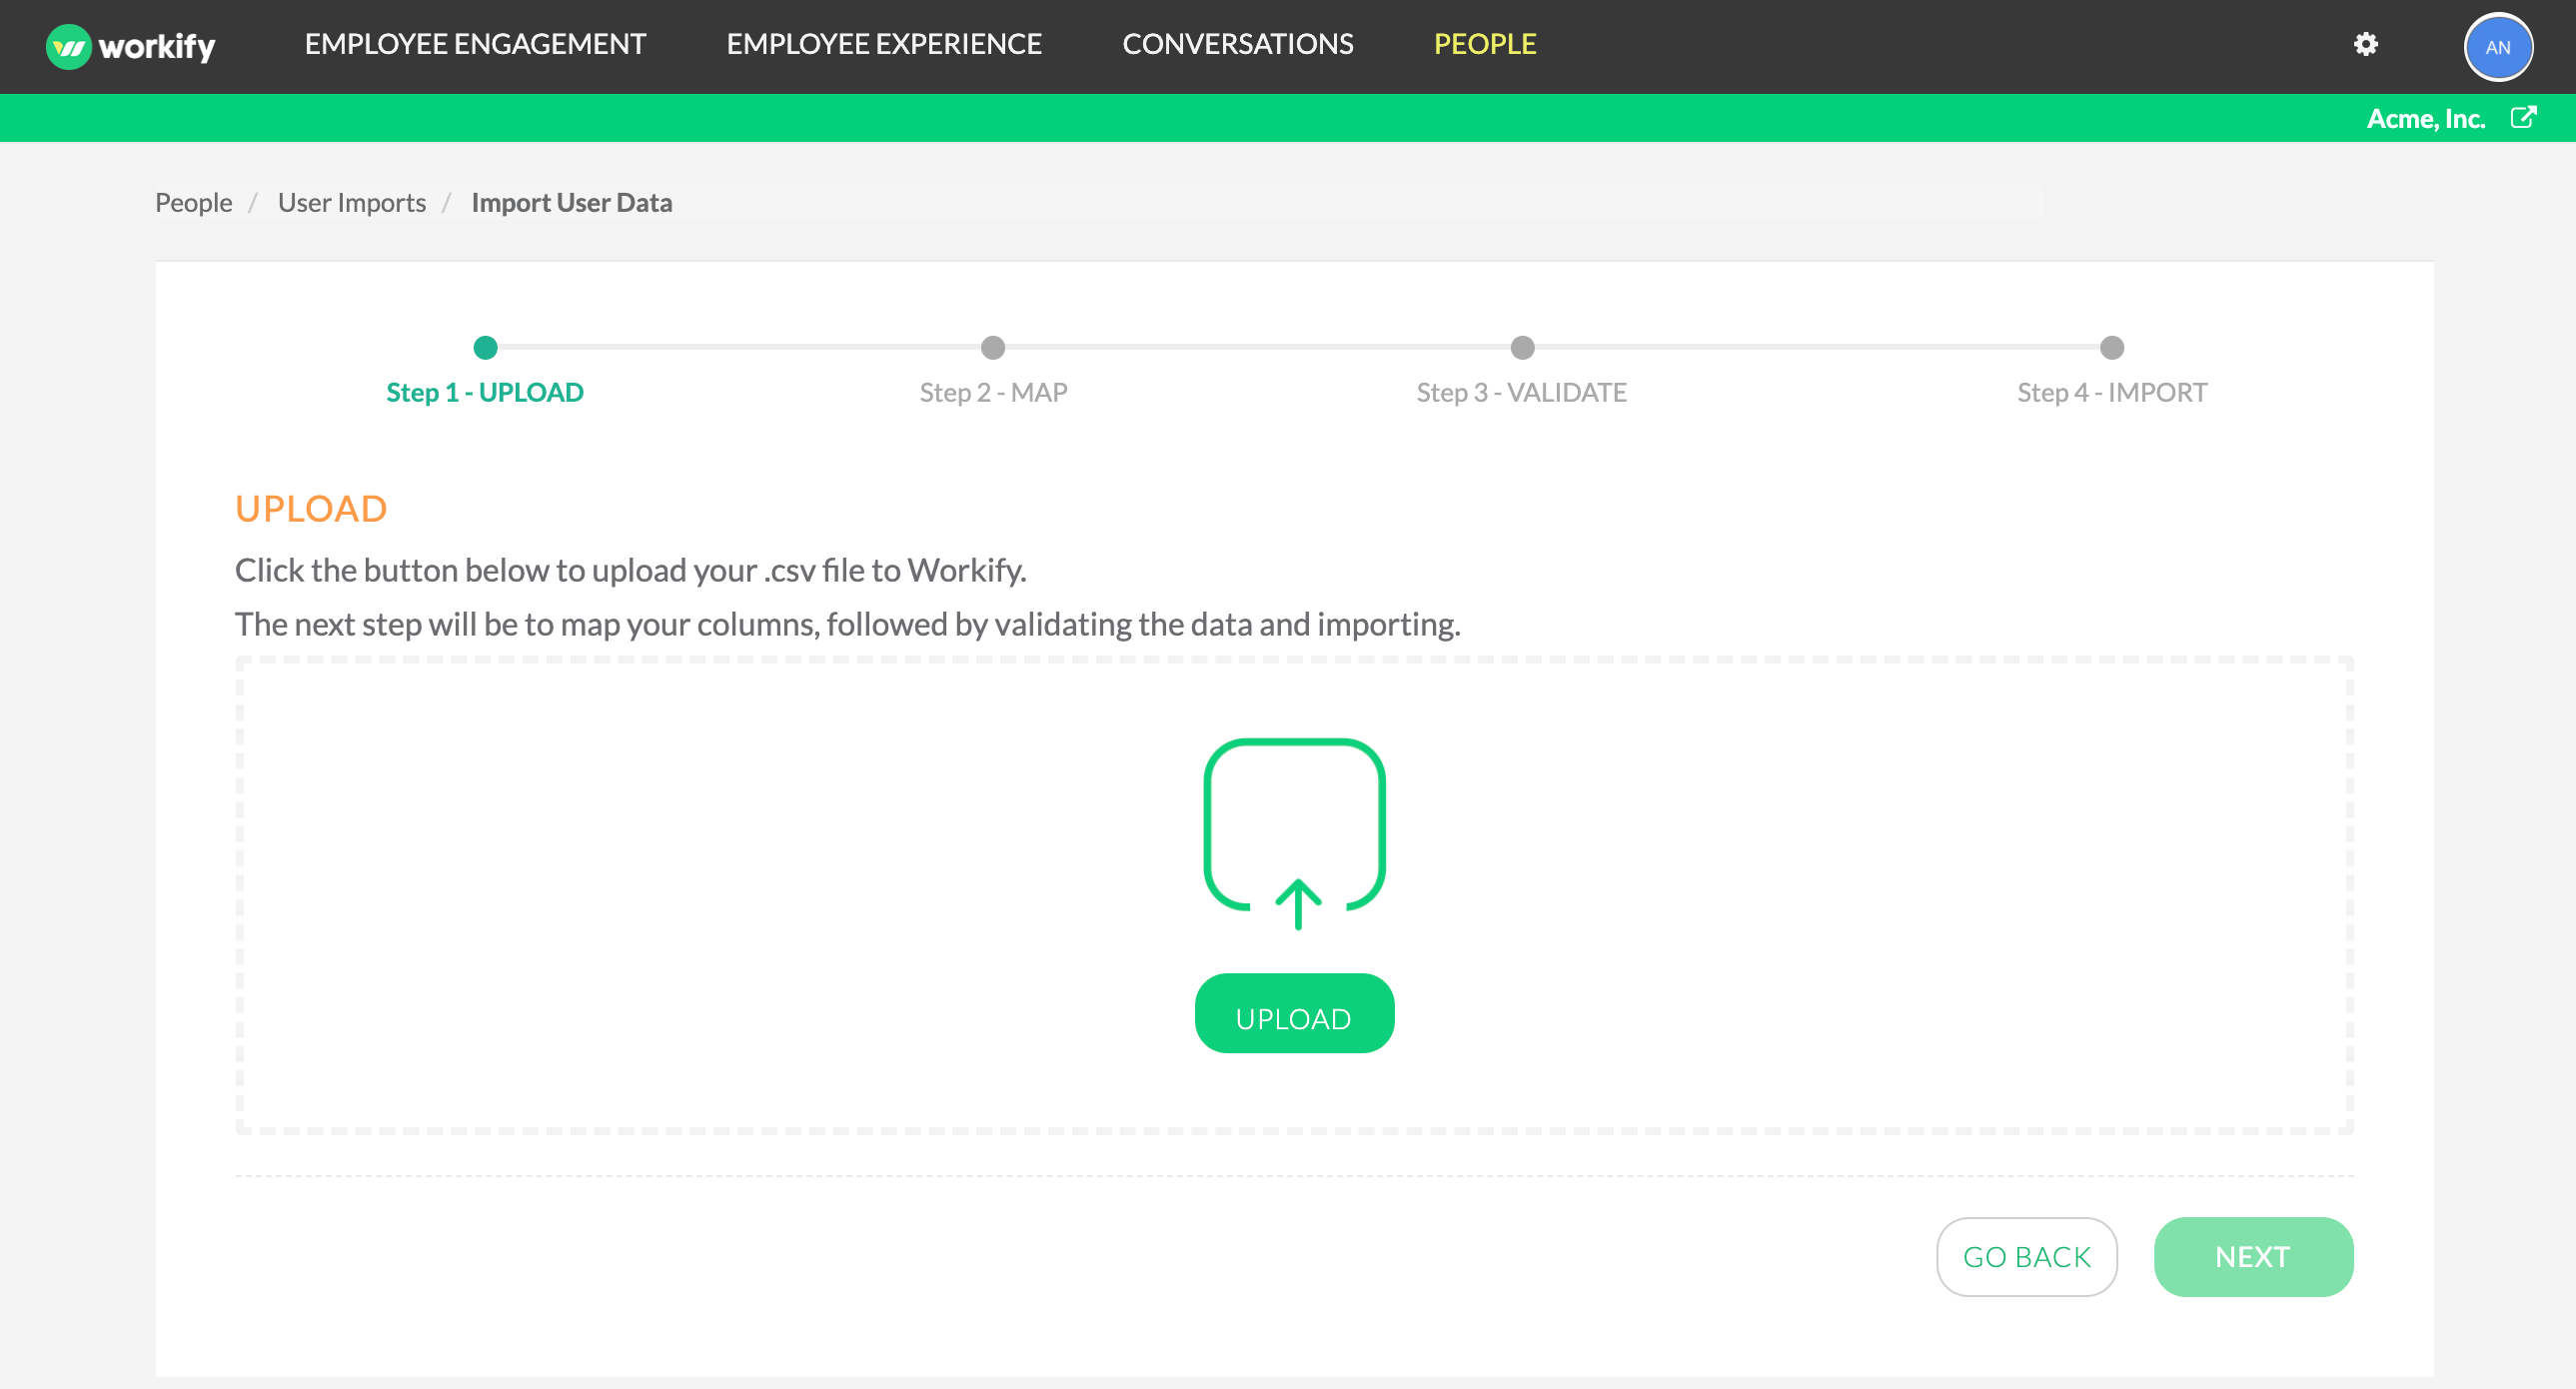
That should take you to a screen like this, where you will upload your .csv file.
Step 2 – Map
After uploading your data sheet, you can move on to step 2 of the importing process: Data Mapping.
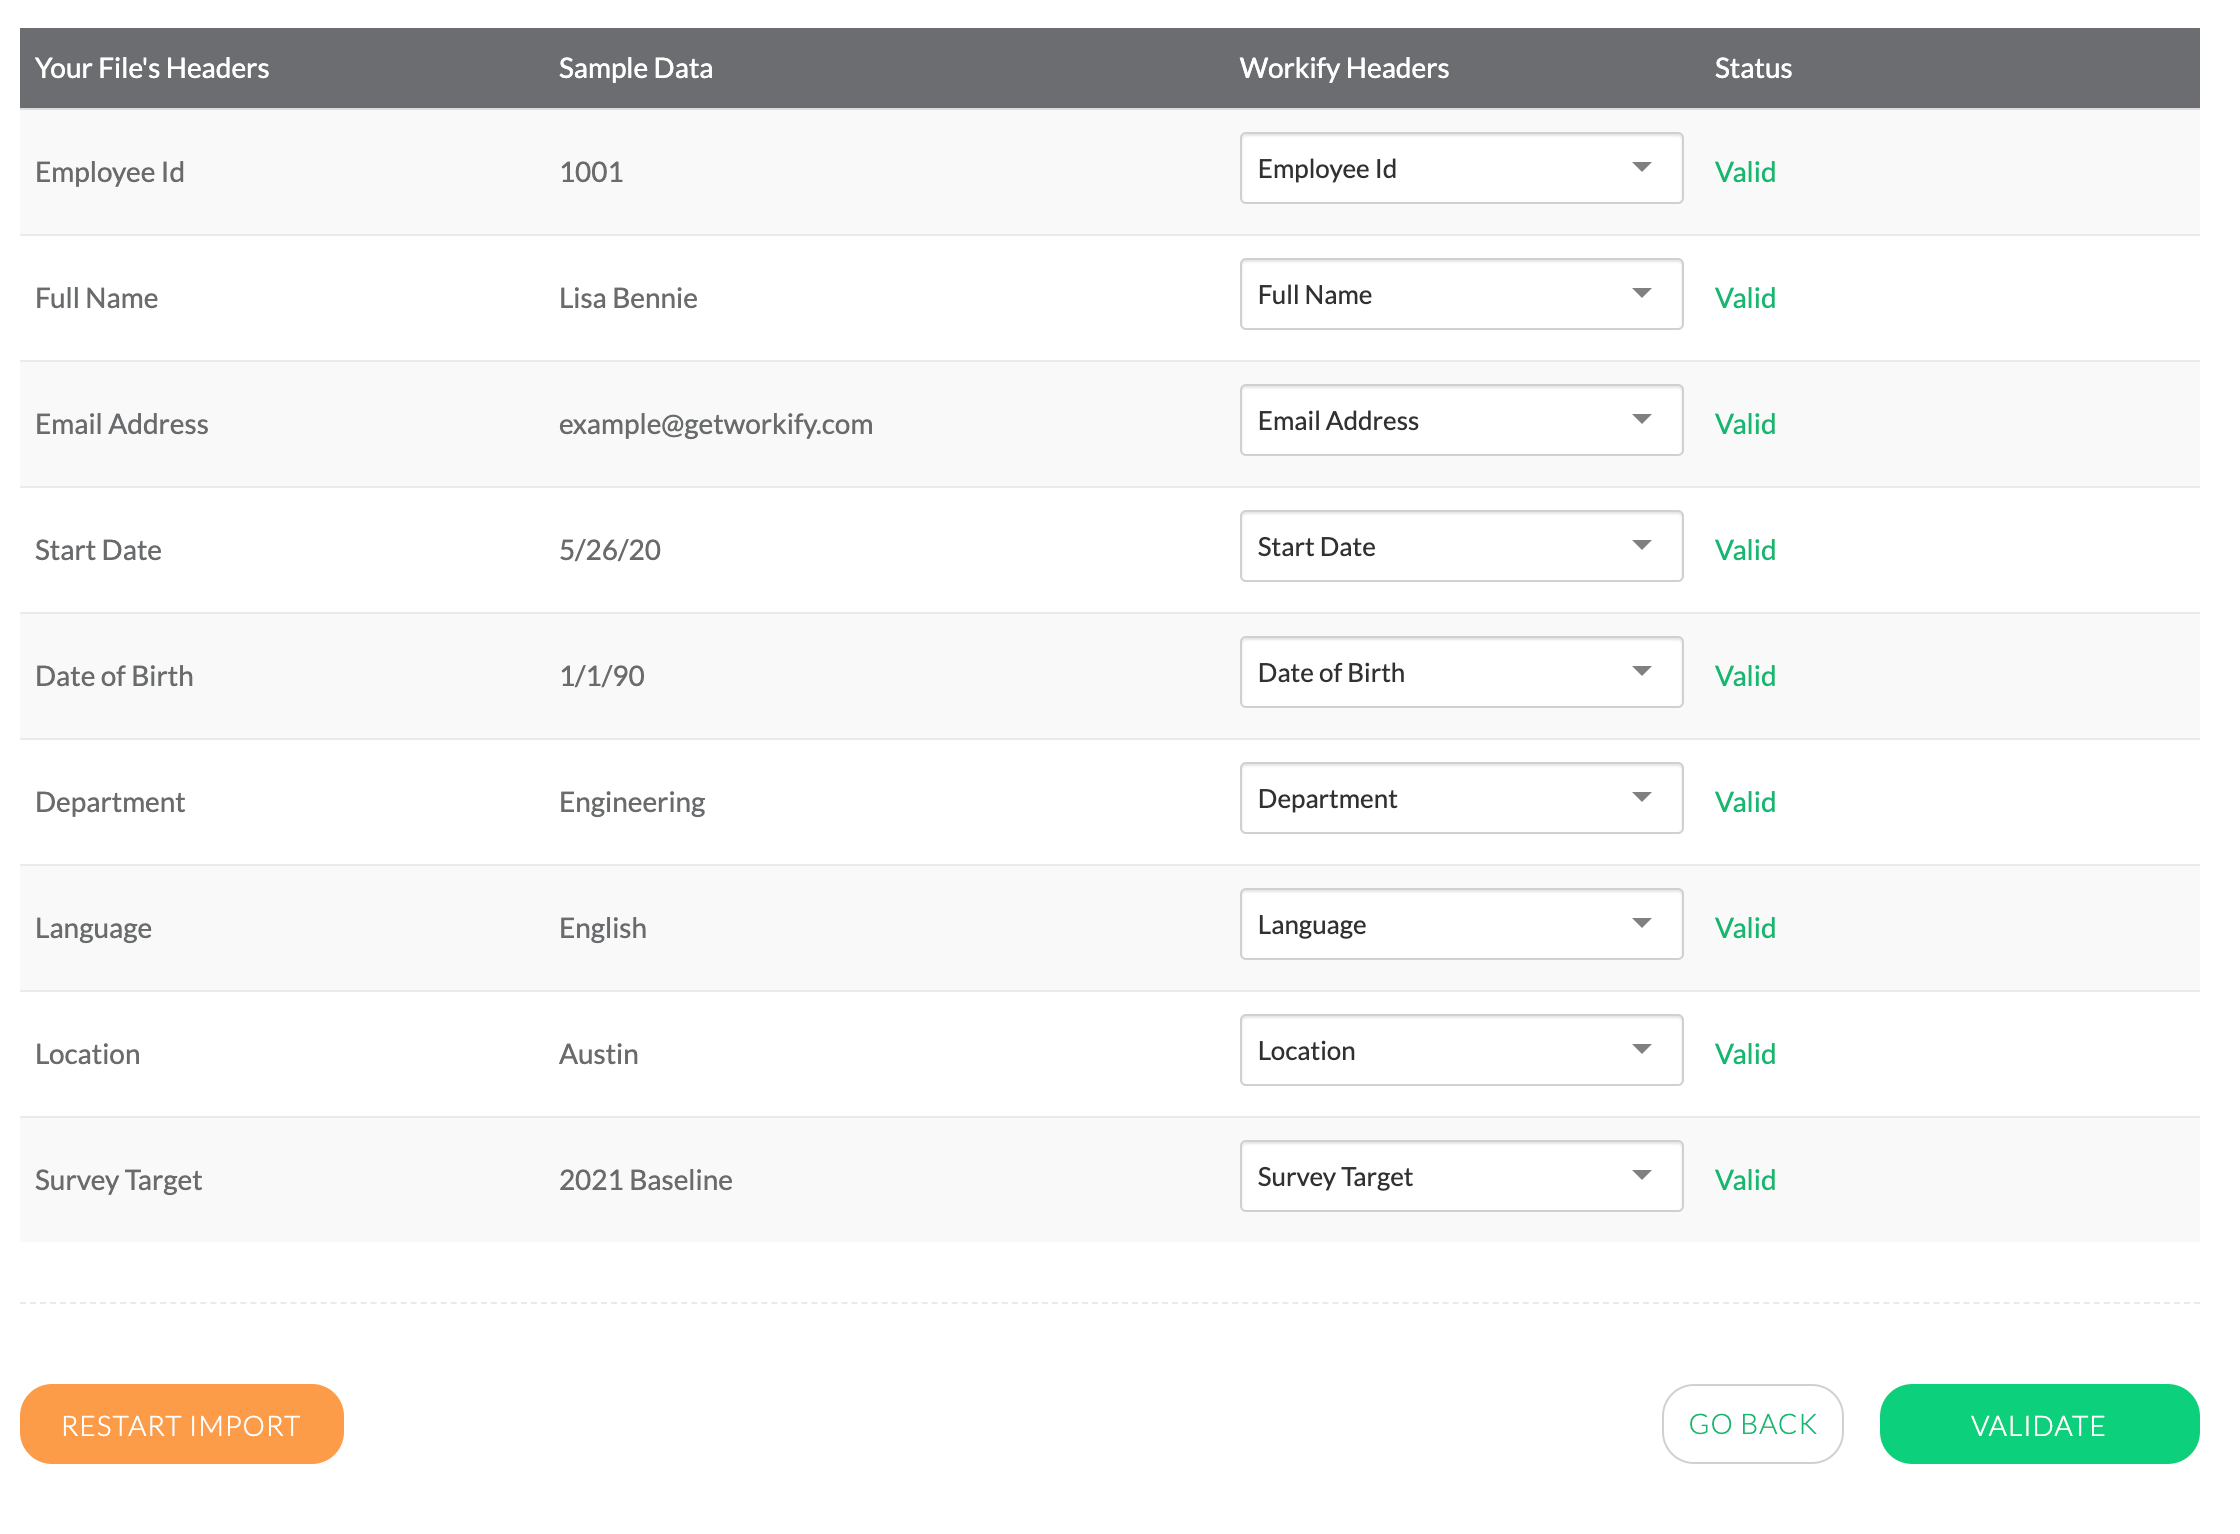
In this step, you’ll want to make sure that all the data is correctly mapped to your metadata fields already stored in Workify. To do this, make sure that all rows in the Status column show as ‘Valid’. If a row doesn’t show as ‘Valid,’ use the drop-down menu under the Workify Headers column to map the data to what is stored in Workify, or create a new field by simply typing in the new header. If the metadata field does not already exist in Workify and you are not able to create the new field on your own, please reach out to your client success rep for help creating any new fields.
If this is your first upload, please just input your field names as you’d like them to display under the ‘Workify Headers’ section.
If you are missing any elements in your data sheet, please read this next section.
After mapping the metadata elements, check that all data under the Missing Fields section is kept. Missing Fields are data columns you previously uploaded that are not included in this current data file.
To do this, click the Keep button highlighted in green so that all previous fields are stored correctly. It’s important that fields aren’t removed in order to keep records of historical data.
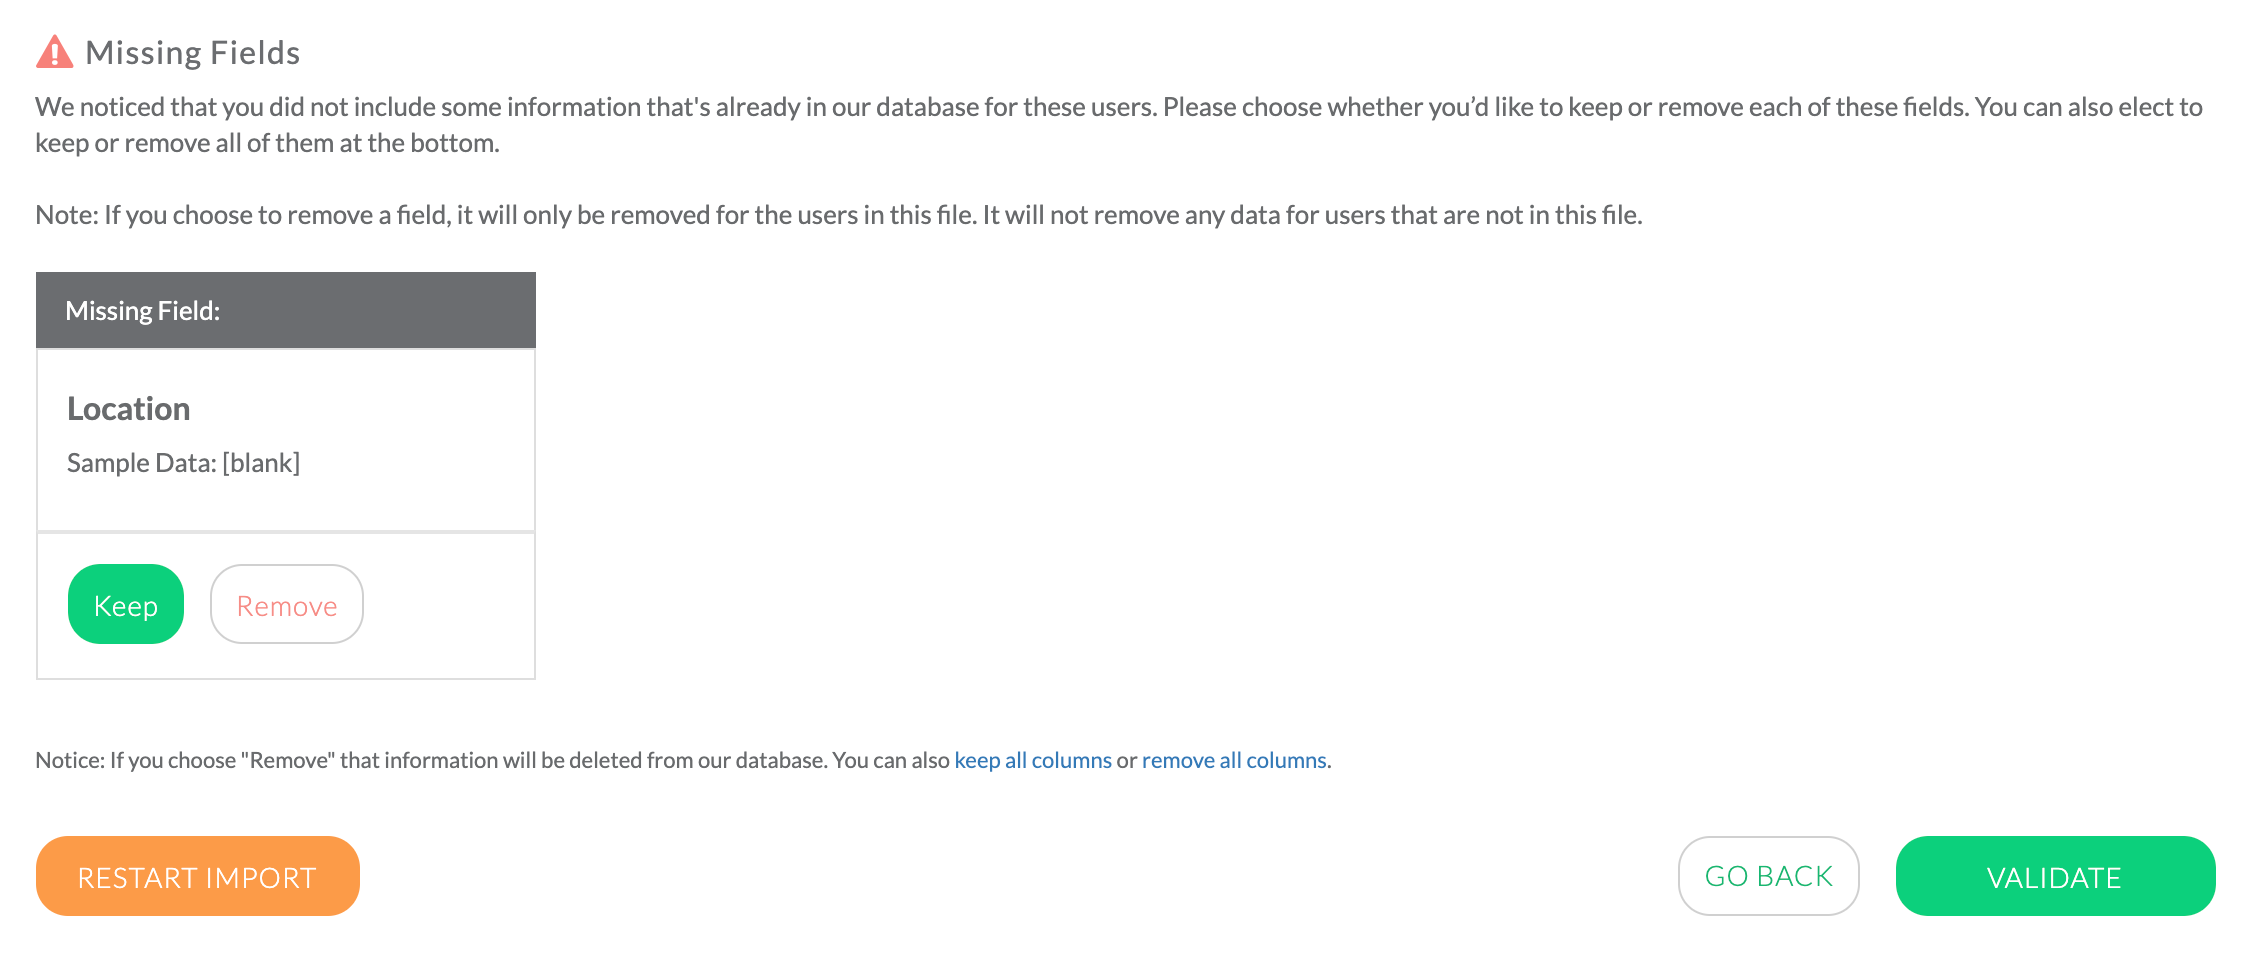
After all data mapping is confirmed, click VALIDATE to continue. This should redirect you to the import details page.
Step 3 – Validate
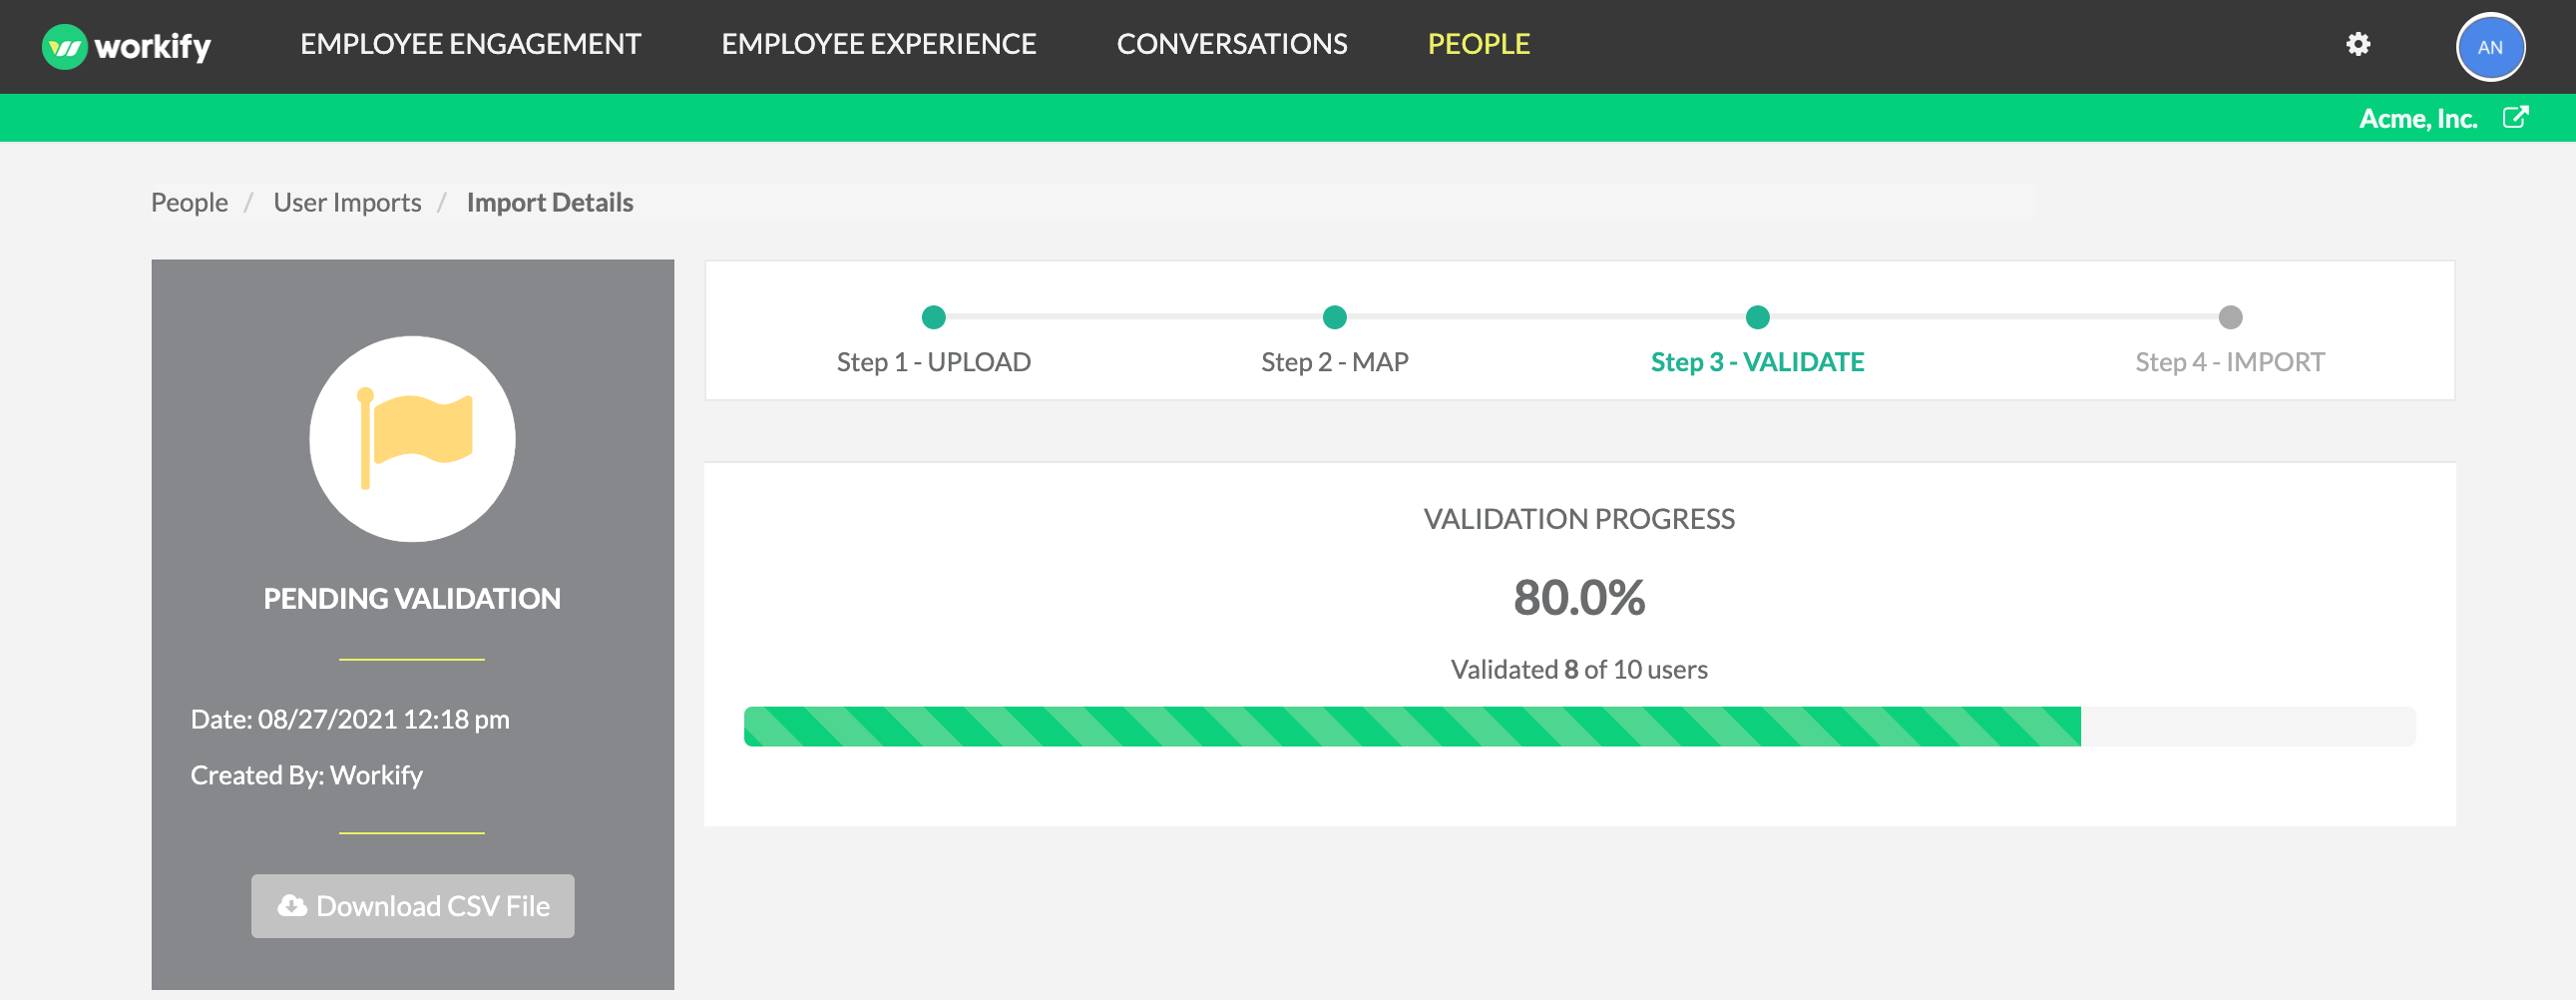
On this page, you will be able to see the validation progress.
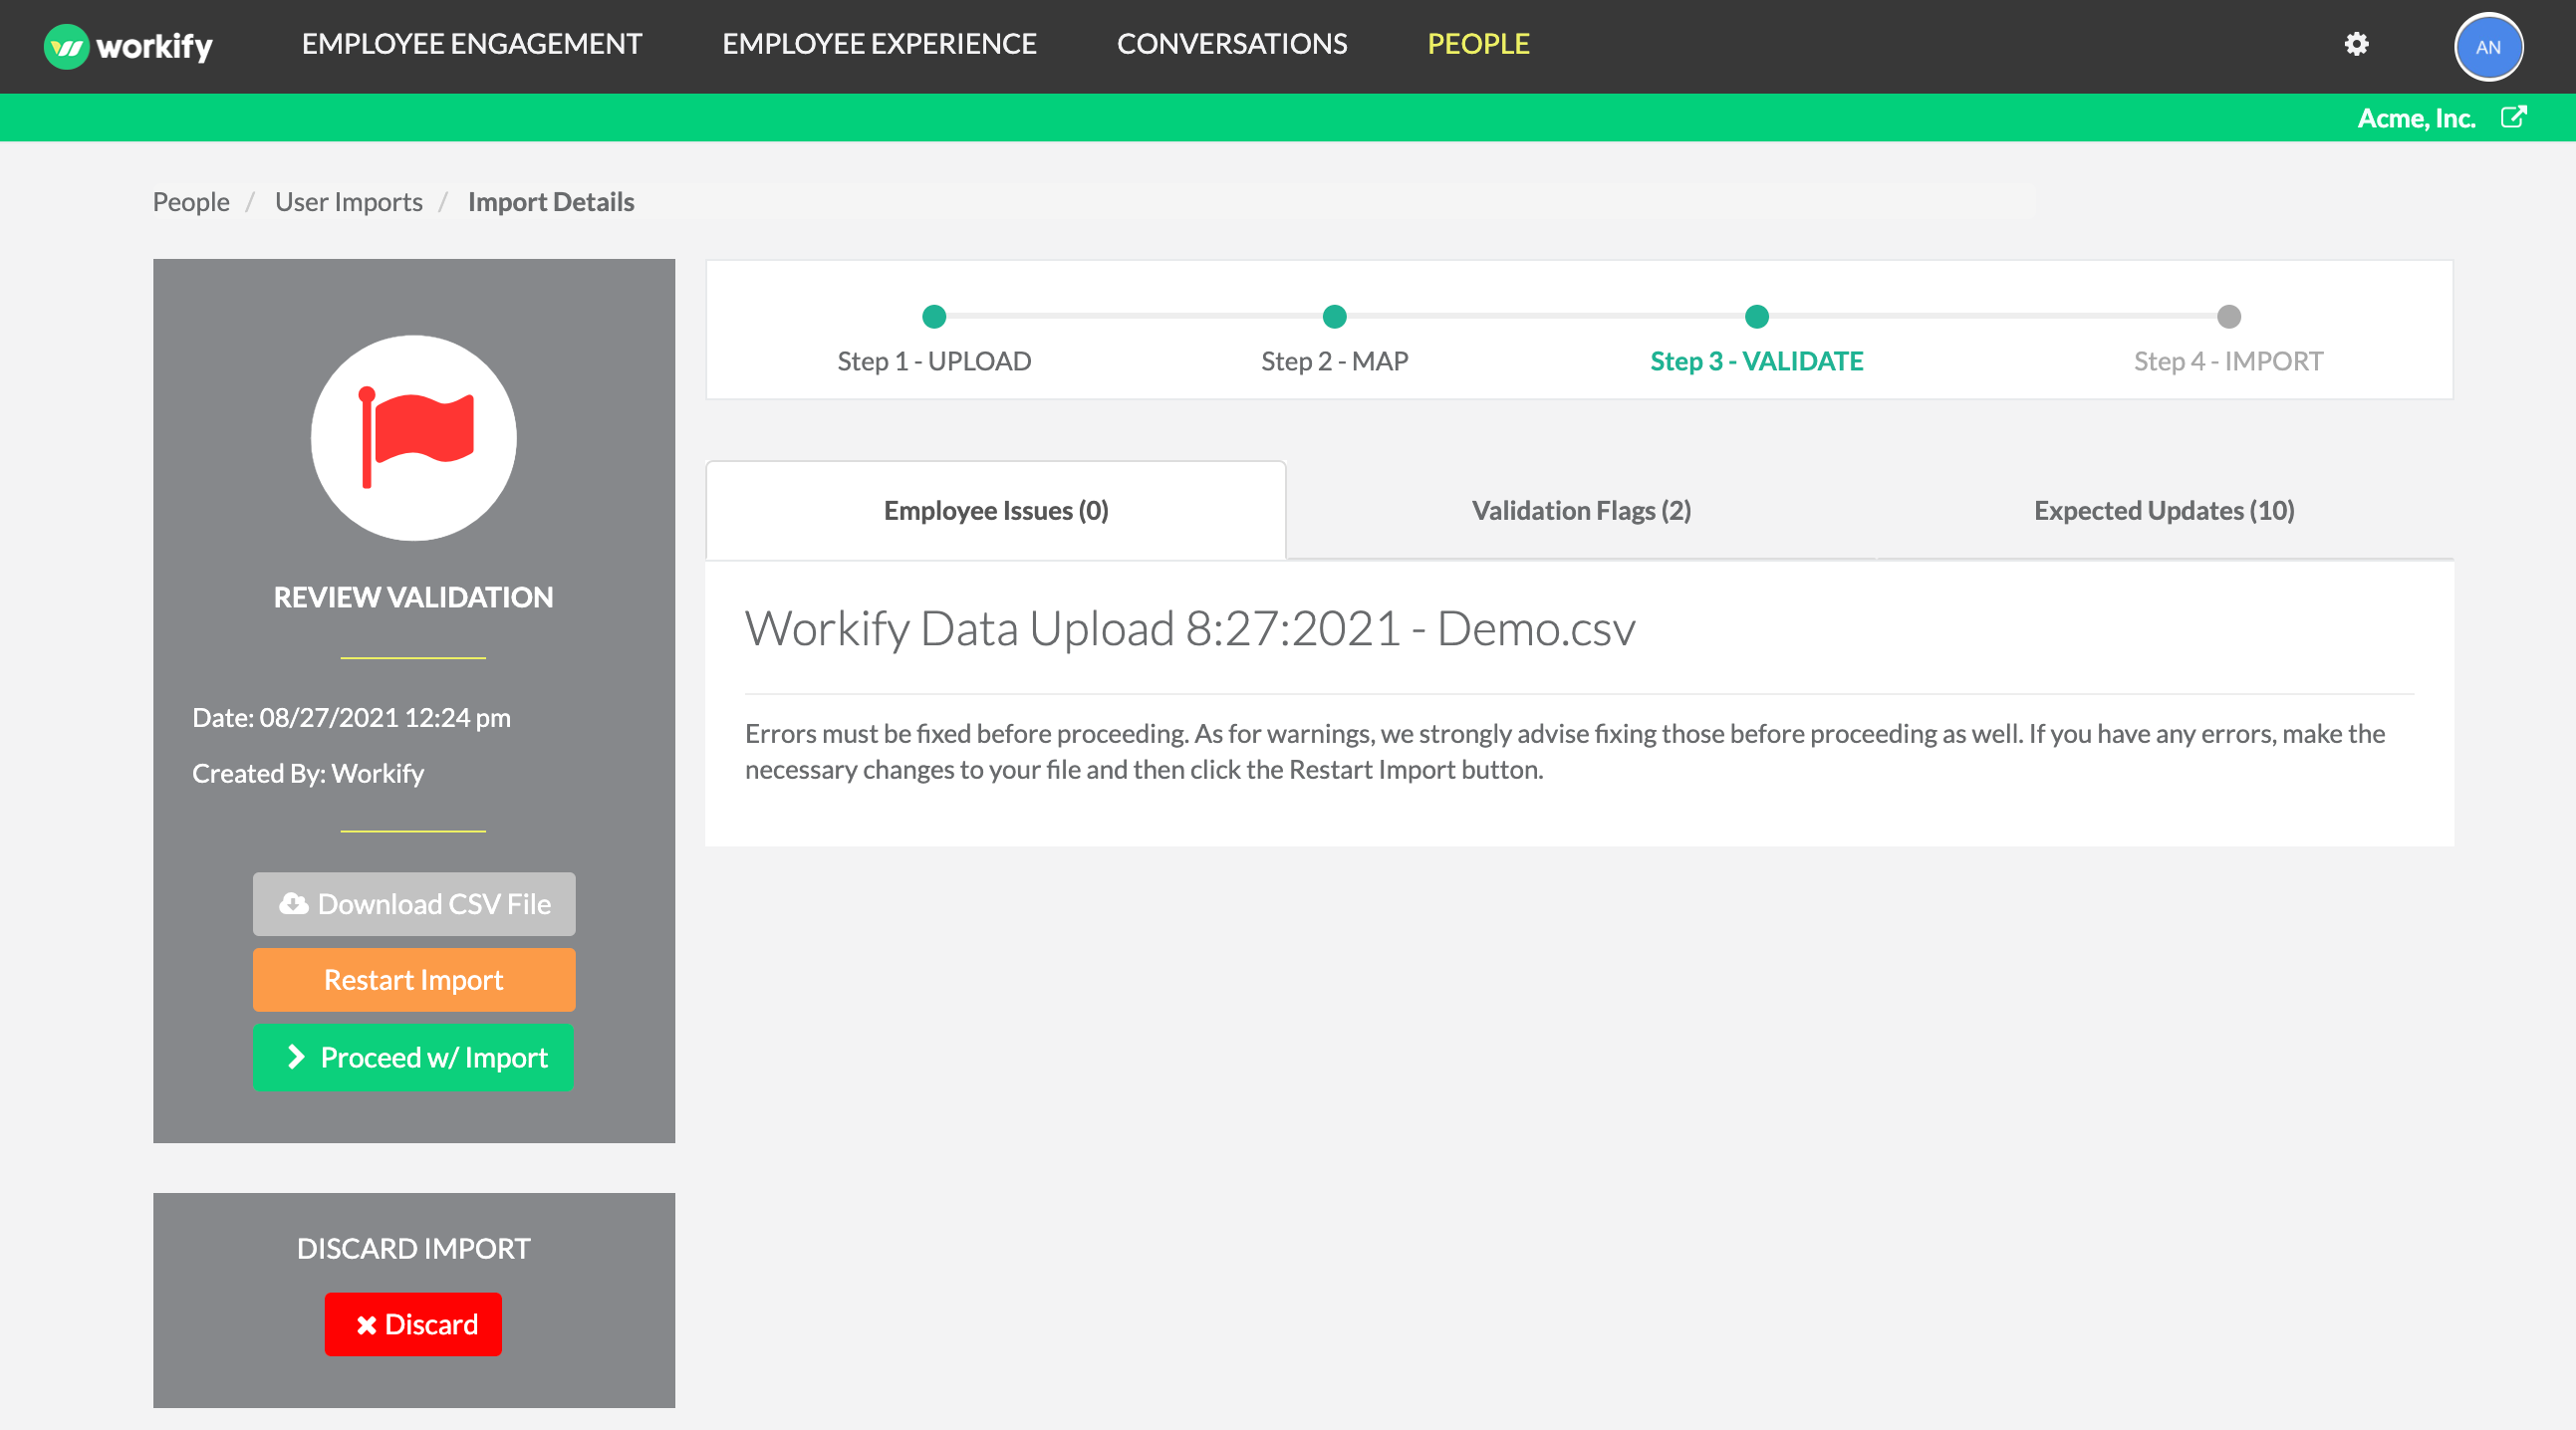
After the Validation bar reaches 100%, you should land on a page like the picture above. There are three tabs in this section:
- Employee Issues
- Validation Flags
- Expected Updates
The first tab called Employee Issues will show any critical errors, or warnings, found in the data sheet. These errors usually happen when a required field is left blank (Name, Email, or Start Date). The errors that show here will keep those specific employees from being uploaded or updated in Workify.
Errors must be fixed in your data sheet before proceeding. If you have any errors, make the necessary changes to your file and then click the Restart Import button.
As for warnings (i.e. missing employee Ids), these are highly recommended to fix, but they will not stop you from moving forward in the process. If you are not able to input employee Ids, feel free to contact your CS representative with any questions.
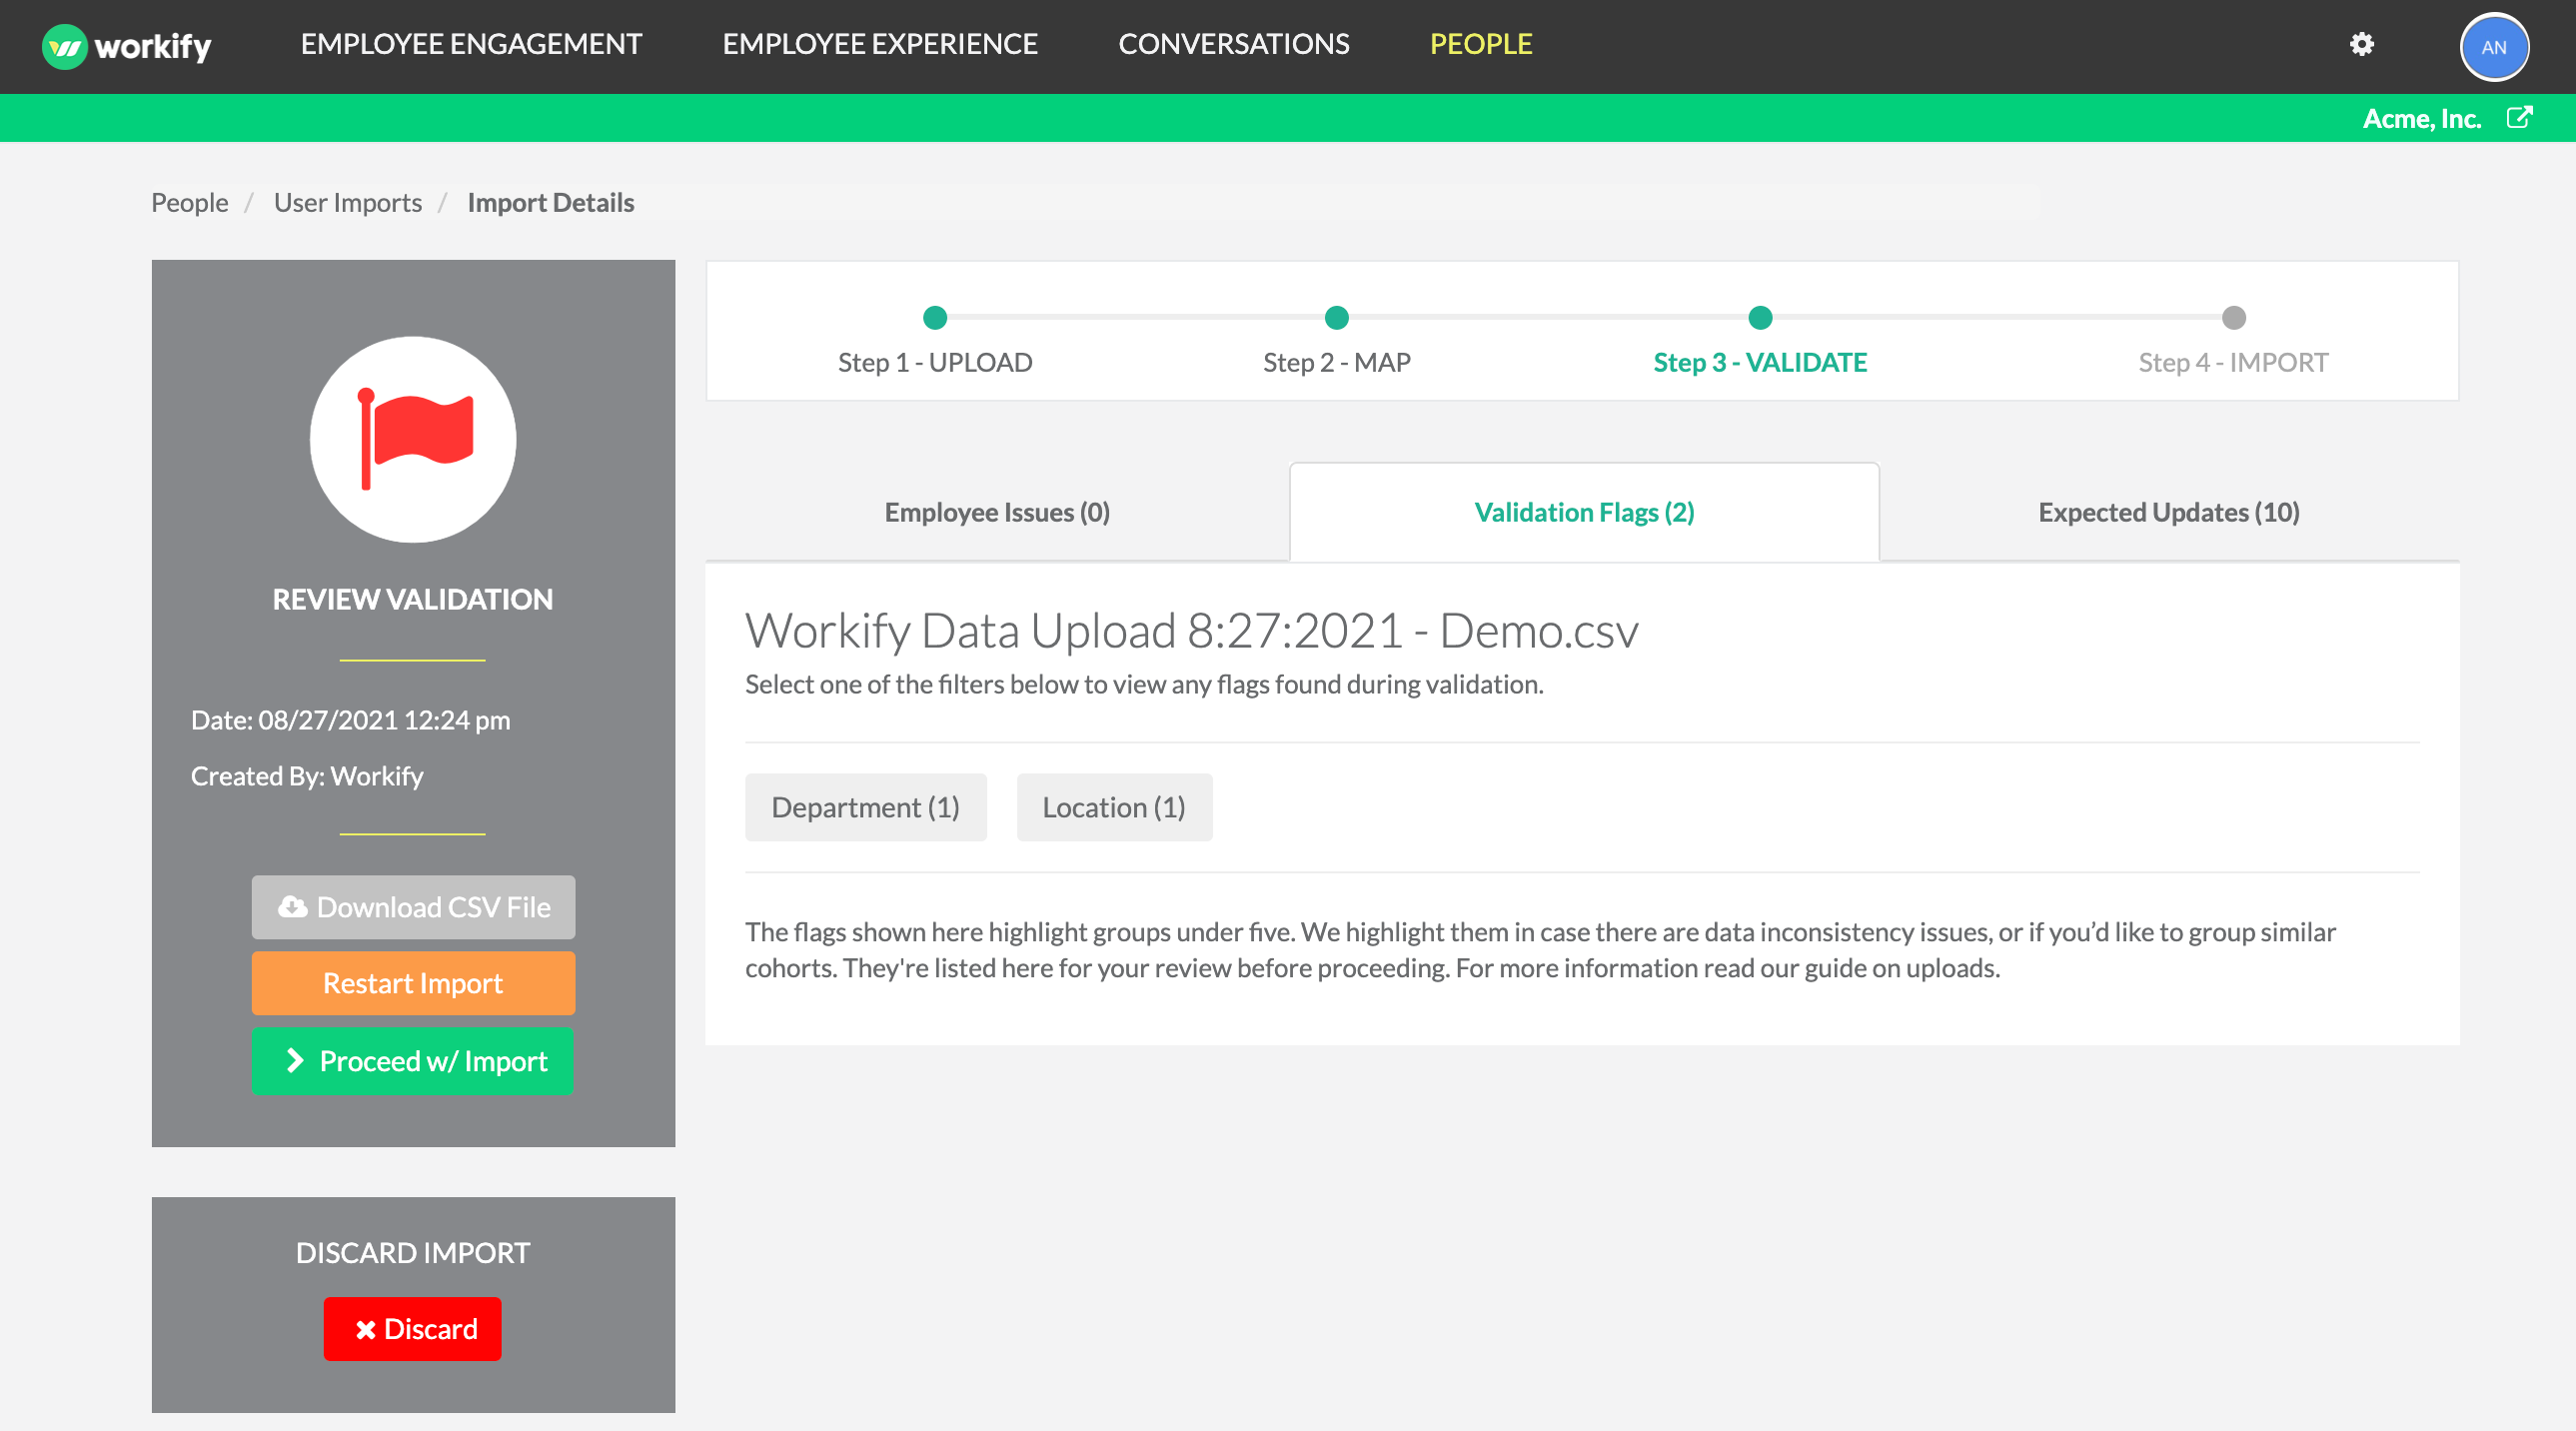
The second tab called Validation Flags will show any anonymity discrepancies. If a single data sheet is being used for a survey, this tab will show any groups of people under five that won’t display in reporting (per anonymity rules). The data callouts in this tab are highlighted in case there are data inconsistency issues (i.e. miss spellings), or if you’d like to group similar cohorts.
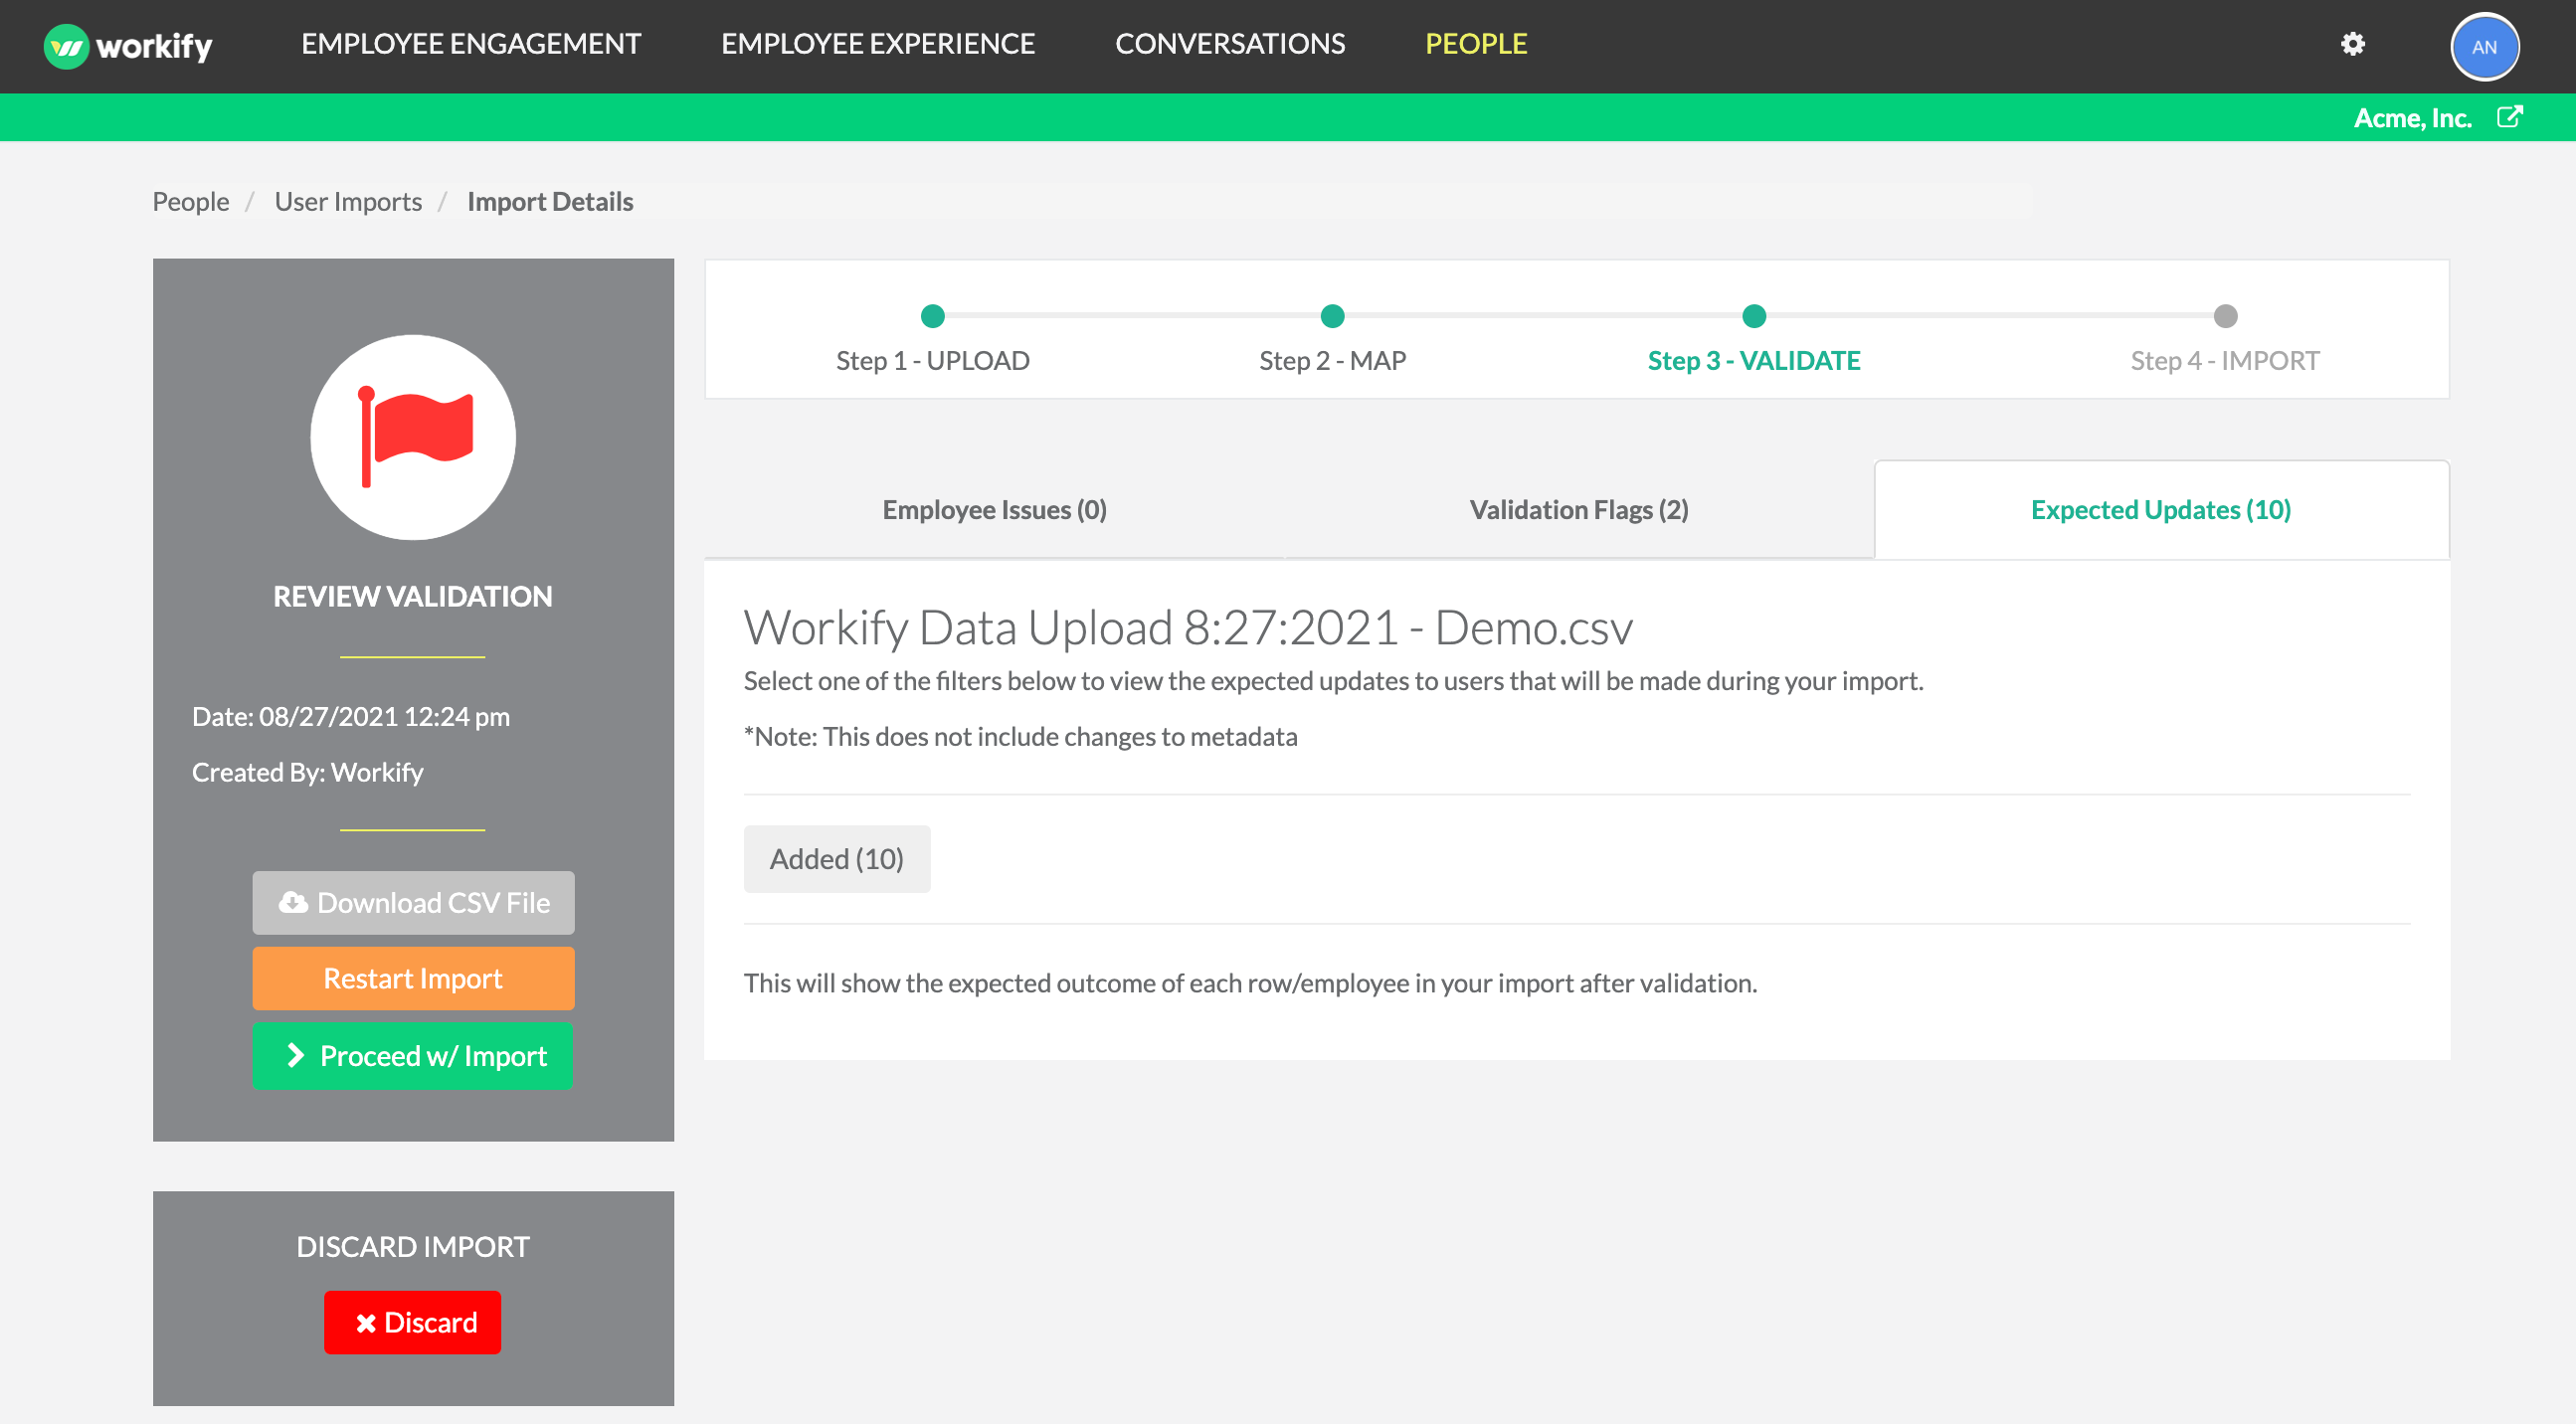
The final tab is called Expected Updates. You can select one of the filters in this section to view the expected updates to users that will be made during your import. In other words, this shows how the data already stored in Workify will be changed/updated with this data file.
Step 4 – Import
The final step will be to Import. After this button is pressed, a module will pop up and prompt one final action.
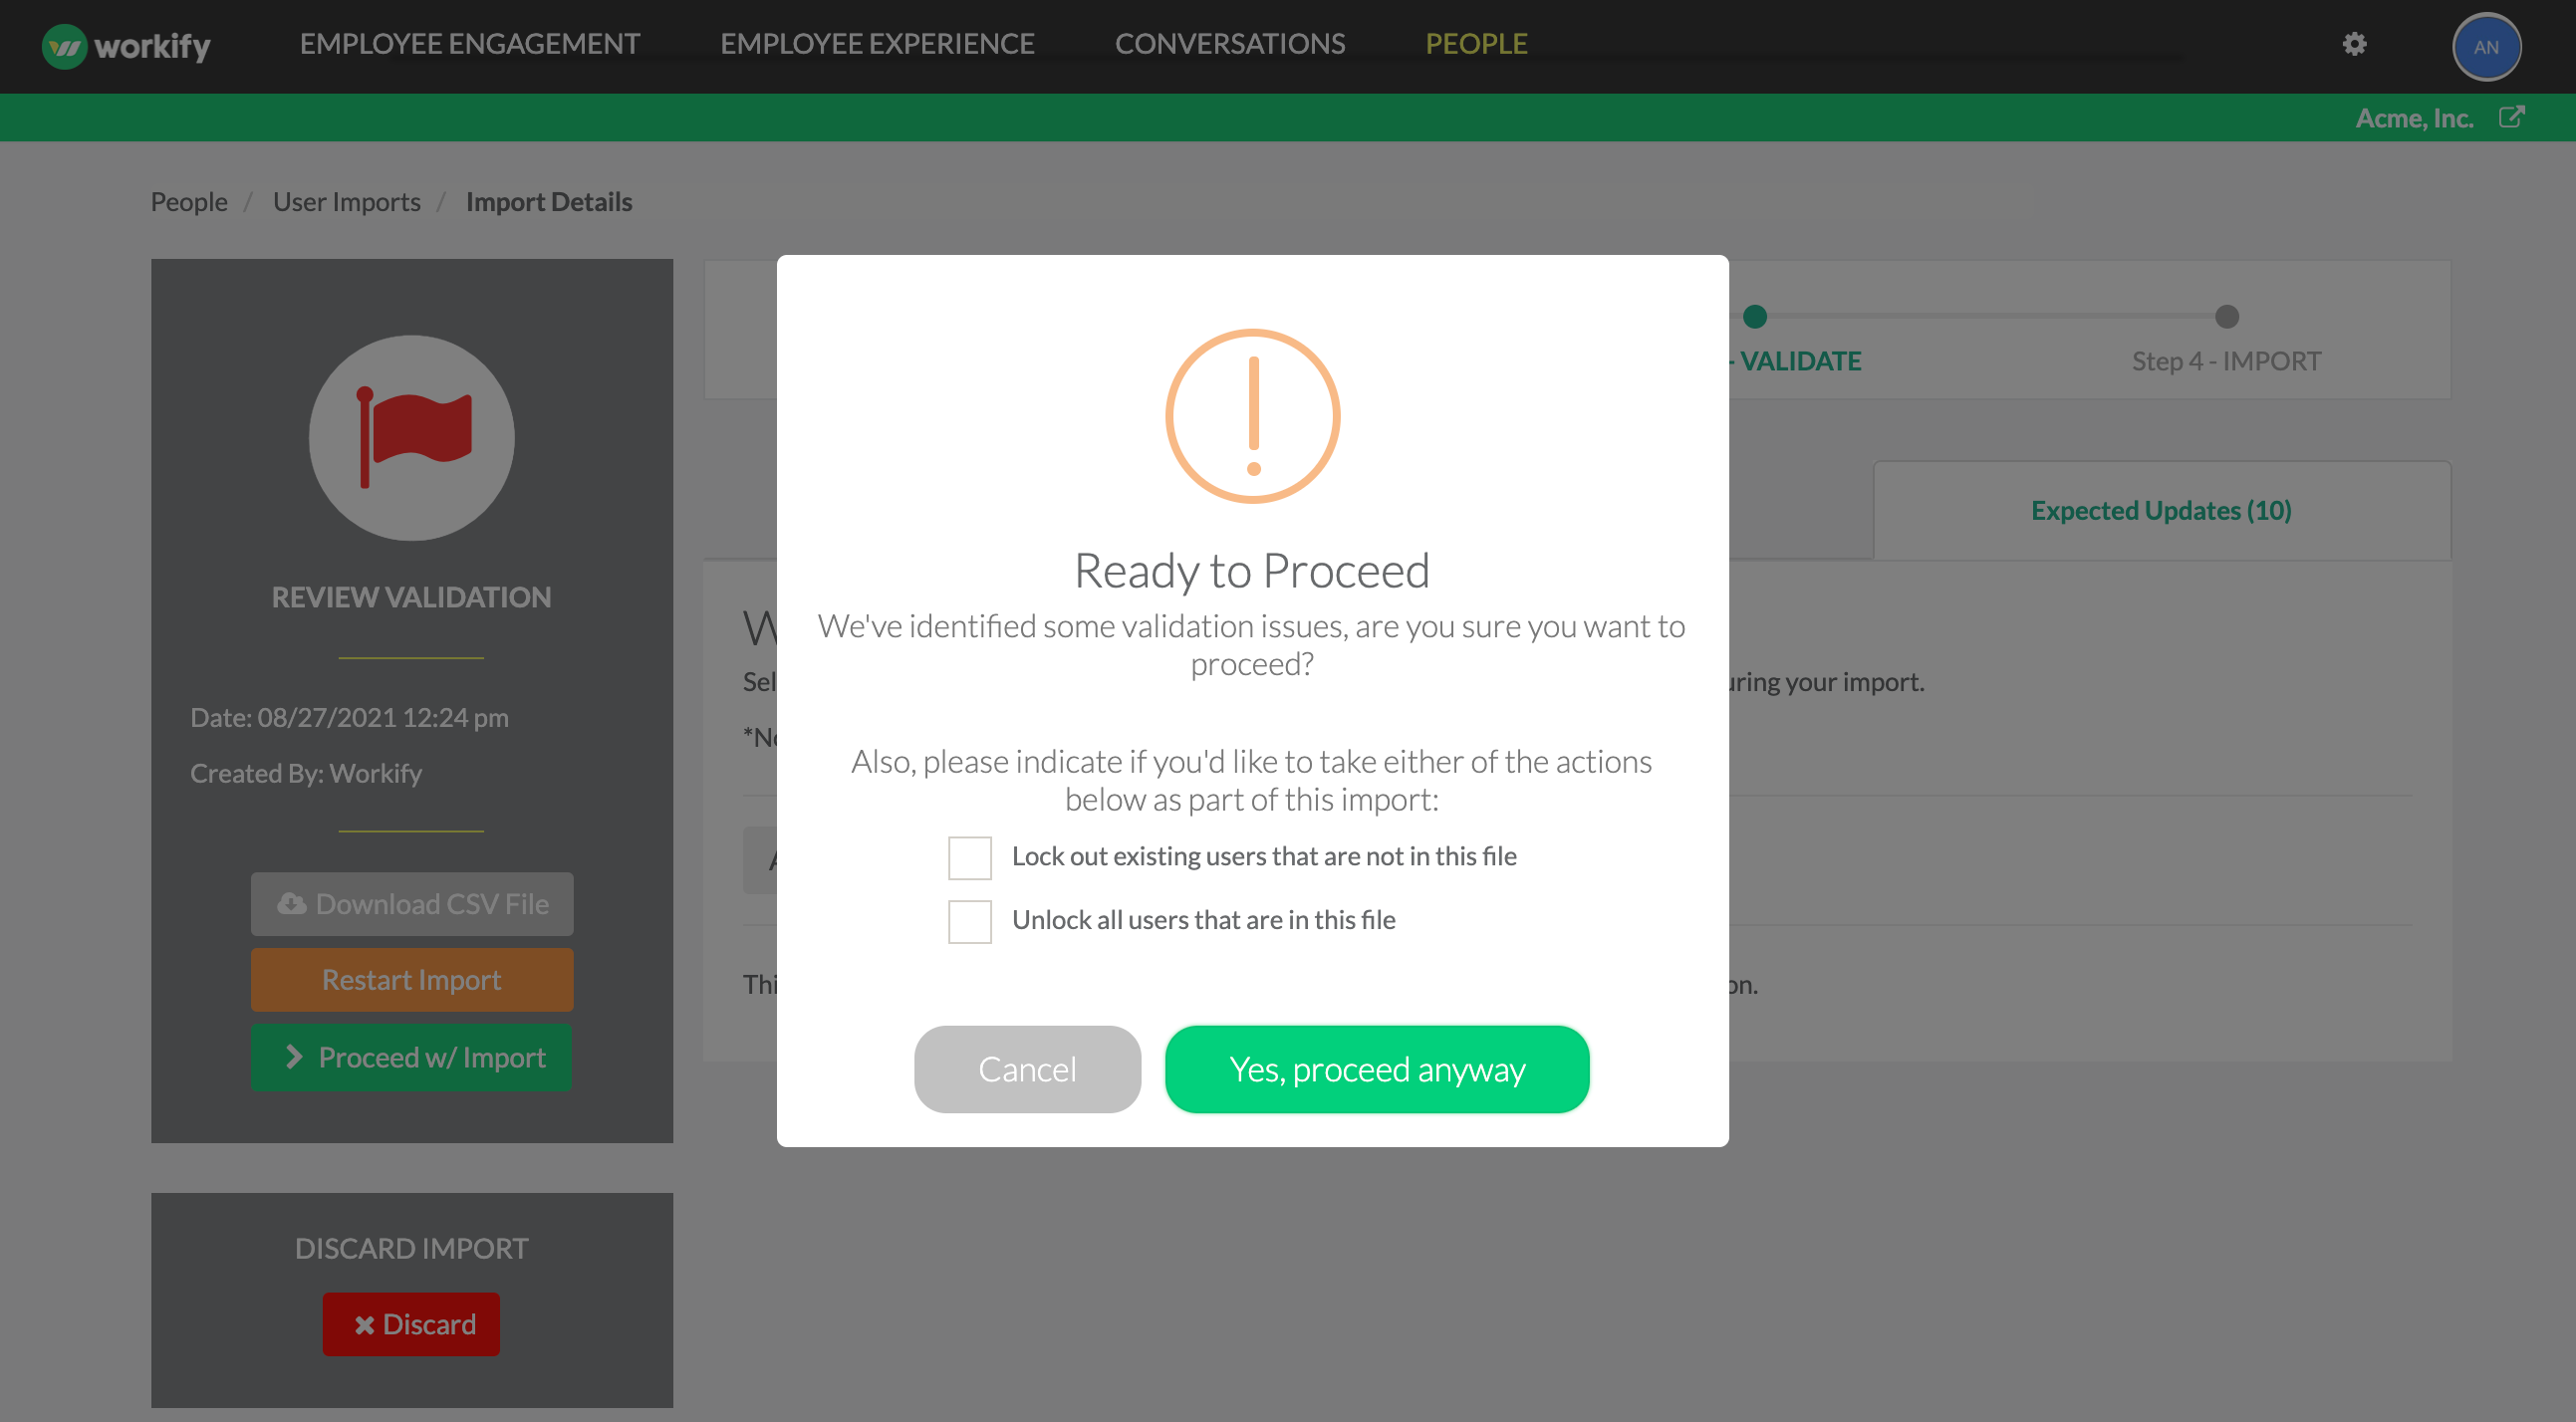
You may (1) Lock out existing users in the Workify system that are not included in the file or (2) Unlock all users that are being imported in this file. Additionally, you may select both of these options.
To further clarify both options:
- This option is what we want to use in the case of terminations or employees no longer with the company. We keep them out of the data file and then tell the Workify system to lock out anyone that is not in the file.
- This option is helpful in the case of re-hires. This is telling the Workify system to unlock employees that we may have locked out in the past.
If we decide to check both boxes, this is essentially telling Workify that this file is our single source of truth.
This feature is especially useful when you are uploading a full company census.
However, if you are just uploading a batch of first time employees into the system (e.g. five new employees), you are okay to proceed in the import process without selecting either of these options. As we’re not looking to lock anyone out or re-activate any re-hires; we’re telling the Workify system we just want to add these new employees.
After you select the ‘Yes, proceed anyway’ button, the data sheet will immediately upload and update into Workify, so it’s important to make sure that everything is right before clicking the import button.
Please note: the People page may take a few minutes to reflect all the changes after the import has finished.
If you have any questions about managing your user data in Workify, please feel free to contact us at clientsuccess@getworkify.com.